This will be a series of posts that will collect slowly over time. The idea is to collect photographs... from Fotografiska (Museum of Photography) here in Stockholm, and sometimes maybe my own photographs too...
The idea is to use the photographs to stimulate dialogues with children... so these posts are not going to be long... just some images and some questions to get dialogues started.
If you are in the Stockholm region, then you could always bring your children to Fotografiska and explore the photographs that way... of coming with young children with the aim to talk about a few of the images... then it can be an idea to visit first as an educator and discover some of the photos that you think would interest your children the most and encourage the best dialogue... and it is also good to check which photos to avoid... some exhibitions are not suitable for young children... or include images that some might find frightening, not because they are scary per se but there is a child with a particular fear... for instance when my children were younger they went through a short phase where clouds and owls were scary... so I would not have taken them to see photos of those and expect a deep meaningful dialogue... children need to feel comfortable to participate. You will know your children best and know what will work (or what to avoid).
This post has three photographs - two from the Viviane Sassen exhibition and one from the Irving Penn exhibition.
A personal blog sharing experience, reflections and inspiration about education, in particular early childhood education, listening, democratic learning and introducing the idea of Original Learning.
Tuesday, 5 September 2017
What colour is a shadow?
I sit here at Fotografiska (Photographical Museum) with an amazing view from the café restaurant over the water and Stockholm... having being inspired to write a blogpost.
The exhibition by Viviane Sassen had images that explored shape and colour - it also had a room that allowed visitors to explore shadows and colour... the explanation of the shadow exhibition "Aura" is described in the photo below.
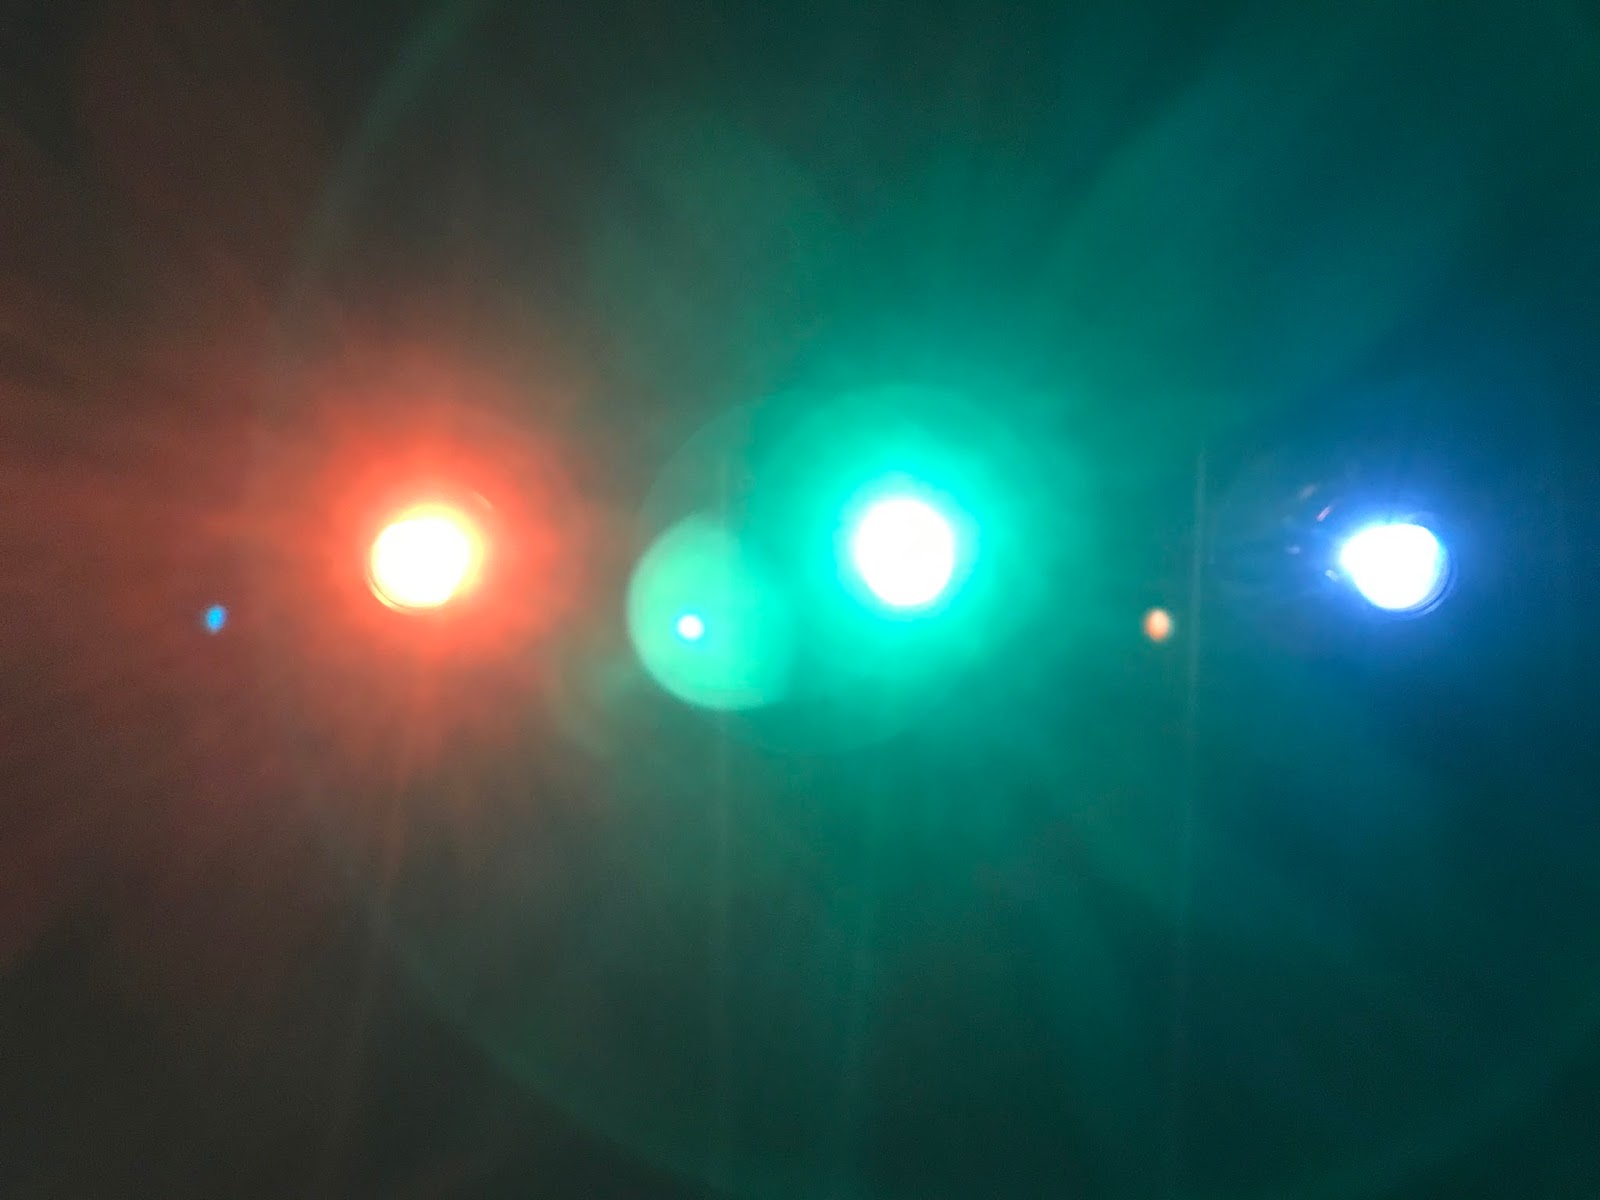
Here are some photos I took of myself exploring the light and shadows and the colours ... of course I took a whole heap... including a whole series of me walking slowly from one side to the other side and watching the colours come onto the screen as my body blocked the lights... as you see below the lights were arranged in a row - and together they made the screen white as you can see below.

The real fun came when you put your body in front of the lights. Personally it would have been fun if there had been a basket of objects relating to the exhibition - squares and triangles to play with as well, and then even more interesting personal art creations could evolve.
Below you can see two examples of her work where Sassen explores shapes and colours. Having worked with young children for a very long time I find these photos very inspirational as an inspiration source with children... to give the children various shapes and colours and to create shadows and take photos of their work... even without the use of shadows this would work as a great art exploration of shapes and colours.


These images remind me of a light and shadow exploration in Aðalþing Leikskóli (preschool) in Iceland... below are some photos I took there. The lights COULD be arranged in the same way as above to create the coloured shadows... apparently I was too mesmerised by the whole thing to actually take a photograph of that and of the lamps... they were lights that that were on a flexible neck so they could be moved around for the children to explore.
In June I visited Överby Preschool in Vaxholm community... I have written about their sensory room - and you could read about it HERE as they work a great deal with light and shadow too as part of the sensory exploration. Eva Tuvhav Gullberg was the person who showed me around - she also took me to Redutten and an exhibition of art that she and other local artists had created with children from the area... light and shadow was a part of this too... take a look at the below photographs for inspiration...
A few years ago I created a light and shadow exploration for my preschoolers... here are a few photos from that... the idea was for the children to climb into their own artwork and to experience it in a new way, at the same time create something new... this was the final part of a longer exploration of light and shadows with these children, so they did have an awareness of what they were creating... the first few times were about exploring and playing... so it really is worth repeating these kinds of experiences for the children to gain a deeper understanding and let their play develop into a new kind of learning.
The International Fairy Tea Party has also been a great opportunity to explore shadows and the colour of shadows... fairy wings make great shadows
There are many other ways to explore shadows and the colour of shadows... using projectors, lights, the sun, and overheads...

The potential to explore shadows is great and varied... and so much fun...
a few more photos to inspire to end this post with - outdoor shadow explorations.
The next post from Fotografiska will be taking the perspective of looking at the photographs as a stimulus for dialogues with young children....
Here is the link to Fotografiska to find out more
The exhibition by Viviane Sassen had images that explored shape and colour - it also had a room that allowed visitors to explore shadows and colour... the explanation of the shadow exhibition "Aura" is described in the photo below.
Here are some photos I took of myself exploring the light and shadows and the colours ... of course I took a whole heap... including a whole series of me walking slowly from one side to the other side and watching the colours come onto the screen as my body blocked the lights... as you see below the lights were arranged in a row - and together they made the screen white as you can see below.

The real fun came when you put your body in front of the lights. Personally it would have been fun if there had been a basket of objects relating to the exhibition - squares and triangles to play with as well, and then even more interesting personal art creations could evolve.
Below you can see two examples of her work where Sassen explores shapes and colours. Having worked with young children for a very long time I find these photos very inspirational as an inspiration source with children... to give the children various shapes and colours and to create shadows and take photos of their work... even without the use of shadows this would work as a great art exploration of shapes and colours.


As you see below in the outdoor playworkshop I held last week we also explored shapes, colours and shadows, using the sun, and the recently made colour exploration we had done on a sheet.
This is a very simple way to create shadows... the wetness of the sheet also added an extra dimension to the whole shadow exploration.
Even above you can see that not all shadows are black... which is the usual answer I first get when I ask children, what colour is a shadow...
The below photographs are from the exhibition at the Fotografiska (if you are in Stockholm it is available to check out until 12th of November)
These images remind me of a light and shadow exploration in Aðalþing Leikskóli (preschool) in Iceland... below are some photos I took there. The lights COULD be arranged in the same way as above to create the coloured shadows... apparently I was too mesmerised by the whole thing to actually take a photograph of that and of the lamps... they were lights that that were on a flexible neck so they could be moved around for the children to explore.
In June I visited Överby Preschool in Vaxholm community... I have written about their sensory room - and you could read about it HERE as they work a great deal with light and shadow too as part of the sensory exploration. Eva Tuvhav Gullberg was the person who showed me around - she also took me to Redutten and an exhibition of art that she and other local artists had created with children from the area... light and shadow was a part of this too... take a look at the below photographs for inspiration...
| shining light through a crystal |
![]() |
| shadows via a reflection in a mirror |
| experimenting with using lids and other materials on the lights to create new colours |
The International Fairy Tea Party has also been a great opportunity to explore shadows and the colour of shadows... fairy wings make great shadows
There are many other ways to explore shadows and the colour of shadows... using projectors, lights, the sun, and overheads...
![]() |
| shadow puppet shows... not all of the shadows are black! |
![]() |
| magnatiles on the overhead make colourful shadows |
![]() |
| Sometimes there are great outdoor installations, like this one in Blåsut that creates colourful shadows when the sun is out. |
![]() |
| ice-cream spoons on the overhead |
| more mirrors outside to create reflection and shadows |

a few more photos to inspire to end this post with - outdoor shadow explorations.
The next post from Fotografiska will be taking the perspective of looking at the photographs as a stimulus for dialogues with young children....
Here is the link to Fotografiska to find out more
Monday, 4 September 2017
Bottles of Nature
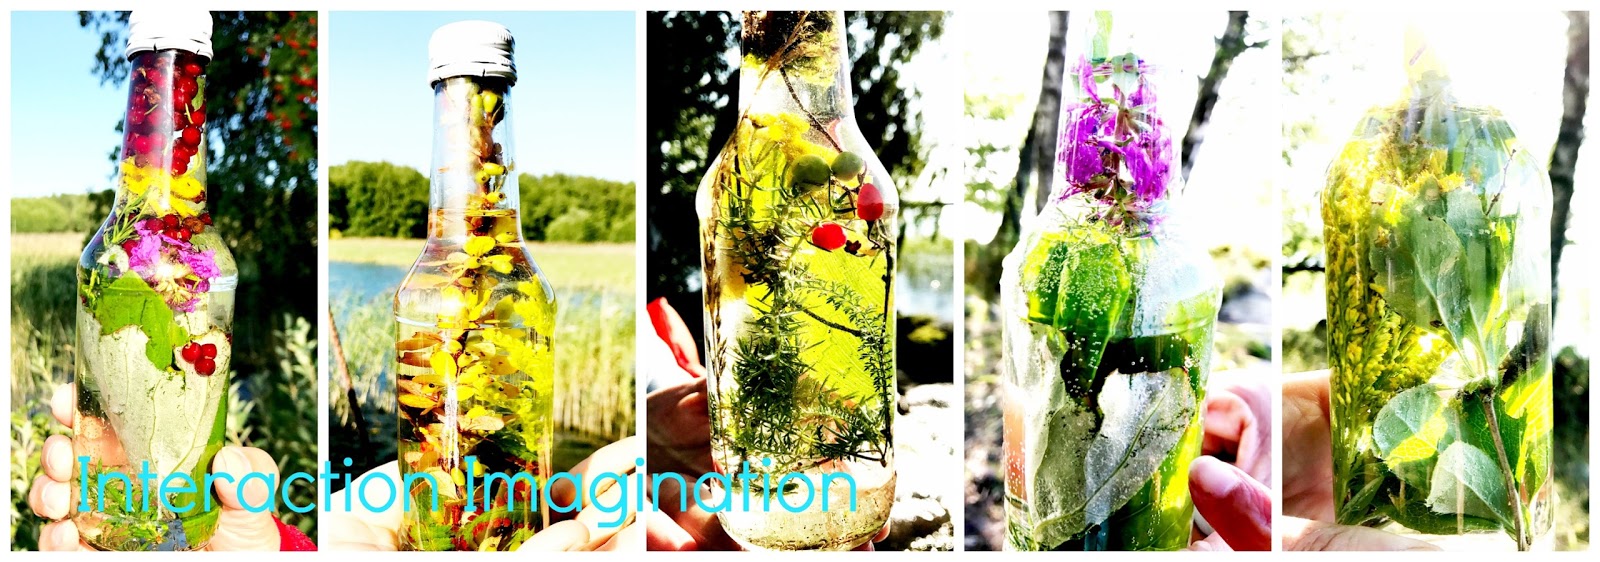
As part of the outdoor play and learning workshop we created bottles of nature. Since I had a focus on brining magic, imagination and creativity into play and learning the International Fairy Tea Party has been a great base for exploring these.
The idea was that the educators (I have also done this with children) should create their own magic potion, using what nature has to offer. I had 10 bottles of water... each filled to the brim, the purpose of this was so that water displacement could be experienced... as they put something into the bottle some water came out... some educators decided to empty a little water to create space... others just placed materials in carefully, and others enjoyed the splash of water coming out as they shoved more nature into their bottle... these are all different strategies and are worth while to observe as a teacher... do the children (or in this case educators) react as you though they would... do the observations give you more ideas about experimenting with water displacement?
No tools were given, so they had to find their own in nature to help get it down the narrow neck of the bottle... again this was with purpose to get children/educators thinking about problem solving.
In the forest there are things that should not be picked because they are endangered... this activity is a great way to share this information with children (and adults) in a meaningful way - to let them know that some leaves and flowers should not be in the bottle and explaining why).
As children/adults look for materials in the forest (or in any outdoor location of your choosing) the children get to see the small details, colours, textures, size, smells that maybe they would have missed. They make their own discoveries in nature.
When the children are satisfied with their bottle there is time to watch the sinking and floating, how the water and nature moves in the bottle if you put it upside down, or shake it... a chance to compare with others... how many have chosen the same things... why was that, what enticed them to putting that nature material in their bottles... this allows the children to see that sometimes the same material is chosen for very different reasons.
Then imagination can be brought back into the activity... what does their potion do... (reminding them that this is pretend) - is the potion meant to be bathed, in, wiped on the skin like a lotion, used on plants, on humans, as a medicine, to change things from one things to another... etc etc there are so many possibilities, really only the imagination can limit them... if you write down their words you have, as an educator, the chance to observe their language and communication skills. There is also the opportunity to take this further... to write stories about their magic potions (either together with the children if they are pre-writers - or let them write themselves if they are already writers and capable of creating their own stories on paper - drawing the story can also be an option). OR, the children could create a story together - thinking about what characters are in the story, what the potions do, For philosophical dialogues you could ask the children... are the potions for good or for bad., why are bad potions made.. how can the potions help people/animals/nature, which of the potions would be the most useful if they had to choose just one and why would it be the most useful...
The bottles I used were made of glass... of course plastic bottles can be used to... there could be an experiment with different size bottles, different shape bottles, different colour bottles... also the liquid used... one bottle could be oil, another water and a third vinegar etc so that over time the different processes could be observed - how do these liquids affect the nature inside them... if doing this maybe there is a need to have a more controlled content... ie the same number of berries, the same number of certain leaves etc...
The bottles can also be explored with light. We had painted on a sheet and when it was still wet we held it up with the sun shining through... we experimented with different materials to create shadows... including the bottles...
Other light sources can be used to explore the bottles - if you see in the film we did this... but think about doing this in the dark as well... or how about using UV light and giving the children the opportunity to experience the difference in colours... thus brining the nature bottles inside and connecting learning in and out.
Over time the bottles will change colour, the water quality will change, the contents will also change... many things the children can observe and ask questions about... or you as an educator can ask why the children think this is happening... thus children are given the chance to learn more about nature and science.
At the end of this post you can see a film I made about these bottles... including film footage of the bottles in action.
Of course there is the sensory value of these bottles too... to watch and be mesmerised with the finished bottles, using them as a calm down feeling. And during the collection process there is the smells and textures as well as the sounds and sights of the nature around them.
Now for a few after photos... as I have kept these bottles for a year, and every now and again taken photos of them using different techniques... from sunlight, to torches and coloured light and also UV light...
Also interesting to watch how SOME of the bottle developed lots of particles at the bottom while others only a bit... so many differences and yet so many similarities to observe and compare and discuss.
The idea was that the educators (I have also done this with children) should create their own magic potion, using what nature has to offer. I had 10 bottles of water... each filled to the brim, the purpose of this was so that water displacement could be experienced... as they put something into the bottle some water came out... some educators decided to empty a little water to create space... others just placed materials in carefully, and others enjoyed the splash of water coming out as they shoved more nature into their bottle... these are all different strategies and are worth while to observe as a teacher... do the children (or in this case educators) react as you though they would... do the observations give you more ideas about experimenting with water displacement?
No tools were given, so they had to find their own in nature to help get it down the narrow neck of the bottle... again this was with purpose to get children/educators thinking about problem solving.
In the forest there are things that should not be picked because they are endangered... this activity is a great way to share this information with children (and adults) in a meaningful way - to let them know that some leaves and flowers should not be in the bottle and explaining why).
As children/adults look for materials in the forest (or in any outdoor location of your choosing) the children get to see the small details, colours, textures, size, smells that maybe they would have missed. They make their own discoveries in nature.
When the children are satisfied with their bottle there is time to watch the sinking and floating, how the water and nature moves in the bottle if you put it upside down, or shake it... a chance to compare with others... how many have chosen the same things... why was that, what enticed them to putting that nature material in their bottles... this allows the children to see that sometimes the same material is chosen for very different reasons.
Then imagination can be brought back into the activity... what does their potion do... (reminding them that this is pretend) - is the potion meant to be bathed, in, wiped on the skin like a lotion, used on plants, on humans, as a medicine, to change things from one things to another... etc etc there are so many possibilities, really only the imagination can limit them... if you write down their words you have, as an educator, the chance to observe their language and communication skills. There is also the opportunity to take this further... to write stories about their magic potions (either together with the children if they are pre-writers - or let them write themselves if they are already writers and capable of creating their own stories on paper - drawing the story can also be an option). OR, the children could create a story together - thinking about what characters are in the story, what the potions do, For philosophical dialogues you could ask the children... are the potions for good or for bad., why are bad potions made.. how can the potions help people/animals/nature, which of the potions would be the most useful if they had to choose just one and why would it be the most useful...
The bottles I used were made of glass... of course plastic bottles can be used to... there could be an experiment with different size bottles, different shape bottles, different colour bottles... also the liquid used... one bottle could be oil, another water and a third vinegar etc so that over time the different processes could be observed - how do these liquids affect the nature inside them... if doing this maybe there is a need to have a more controlled content... ie the same number of berries, the same number of certain leaves etc...
The bottles can also be explored with light. We had painted on a sheet and when it was still wet we held it up with the sun shining through... we experimented with different materials to create shadows... including the bottles...
Other light sources can be used to explore the bottles - if you see in the film we did this... but think about doing this in the dark as well... or how about using UV light and giving the children the opportunity to experience the difference in colours... thus brining the nature bottles inside and connecting learning in and out.
Over time the bottles will change colour, the water quality will change, the contents will also change... many things the children can observe and ask questions about... or you as an educator can ask why the children think this is happening... thus children are given the chance to learn more about nature and science.
At the end of this post you can see a film I made about these bottles... including film footage of the bottles in action.
Of course there is the sensory value of these bottles too... to watch and be mesmerised with the finished bottles, using them as a calm down feeling. And during the collection process there is the smells and textures as well as the sounds and sights of the nature around them.
![]() |
| magic potions with preschoolers as part of an outdoor celebration of International Fairy Tea Party |
![]() |
| magic potion making as part of an indoor celebration of International Fairy Tea Party ... indoors because of the fairy wings did not like rain... outdoor play came later when we took our wings off!! |
Now for a few after photos... as I have kept these bottles for a year, and every now and again taken photos of them using different techniques... from sunlight, to torches and coloured light and also UV light...
![]() |
| sunlight - but why red? None of the other bottles went red despite containing the same berries... is it the mix of materials that has helped the red leach into the water...? |
![]() |
| sunlight shadows |
![]() |
| the mould growing is beautiful... this ONLY happened in one of the bottles |
![]() |
| fairy lights to illuminate |
![]() |
| looking at the details |
![]() |
| fairy lights in front... behind and above and below... what difference does this make? |
![]() |
| UV light... nothing in any of the bottles glowed... some just ended up VERY dark... if you want a contrast, make a nature bottle with tonic water... as that DOES glow with UV light. |
![]() |
| more details . to watch how the colours change with time |
Subscribe to:
Posts (Atom)